PREPARATION
This guide is done on a cloud vps running CentOS 6.4 64-bit. This will also work on any CentOS 6 32-bit or 64-bit but for better compatibility make sure you use at least CentOS 6.3.
Also, although zPanel is very lightweight panel in regard of resource usage (compared to cPanel/WHM), but it is strongly recommended to have at least 512MB of RAM if you wish to use -any- control panel with your VPS.
HOW TO INSTALL ZPANEL CP?
UPDATE: zPanelx v10.1.1 is released. The way how to install it has also changed. Read my new guide on how to install zPanelX CP using its new installer script.
Below is the old one ![]()
Step 1 – Prepare a fresh CentOS 6 VPS. Log in to your server via SSH (use Putty or Terminal) as root.
Step 2 – Now try to stop Apache and MySQL service (just in case if you have them installed and running already).
|
1
2
|
service httpd stopservice mysql stop |
in my case I only have Apache running so I stop it:

Step 3 – Then remove Apache and MySQL service:
|
1
2
|
yum remove httpdyum remove mysql |
Hit Y to confirm. Screenshot:

Step 4 – Now lets download the installer file:
|
1
2
3
4
5
|
# for 64-bit use:wget -O installer-10-1-0-centos-64.sh.x <code>https://github.com/zpanel/zpanelx/releases/download/10.1.0_orig/installer-10-1-0-centos-64.sh.x</code># for 32-bit use:wget -O installer-10-1-0-centos-32.sh.x <code>https://github.com/zpanel/zpanelx/releases/download/10.1.0_orig/installer-10-1-0-centos-32.sh.x</code> |
Pic:
Step 5 – Now you have to make the installer executable:
|
1
2
3
4
5
|
# For CentOS 64-bit:chmod +x installer-10-1-0-centos-64.sh.x# For CentOS 32-bit:chmod +x installer-10-1-0-centos-32.sh.x |
pic:

Step 6 – Also install required packages:
|
1
|
yum install ld-linux.so.2 curl |
You may need to type Y twice for confirmation:
Step 7 – Finally, issue this command to start installing zPanel:
|
1
2
3
4
5
|
# for CentOS 64-bit:./installer-10-1-0-centos-64.sh.x# for CentOS 32-bit:./installer-10-1-0-centos-32.sh.x |
You have to answer few simple questions. The process should take few minutes, so sit tight and wait till it finishes:
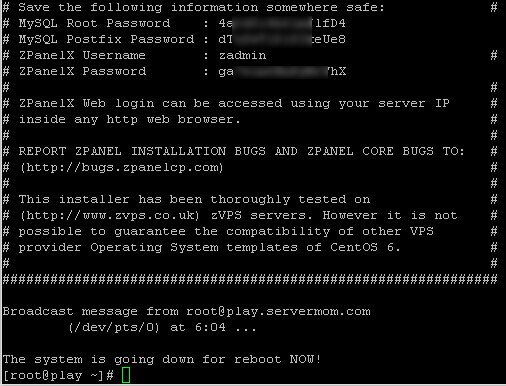
Step 8 – At the end of the process you’ll see all generated passwords displayed, write that down. Also, the process requires restarting your server hence you’ll automatically be logged out from your server.
Step 9 – Now open up your favorite web browser then access your server by typing its ip address. Voila, you’ll now see default zPanel login page. Use zadmin as username and use generated password (step 8 above) to login. Once logged in, you can then change default generated password to something easier to remember but make sure it still uses strong combination.

Step 10 – That’s it. Now you can do some necessary tasks in zPanel control panel area once you logged in. Don’t be worry, all settings inside zPanel are really easy to understood so you’ll be familiar in no time. If you can use cPanel then you should also be able to use zPanel.
NEXT TO DO
- Install zPanel on CentOS VPS (you are here)
- Install Ajaxplorer File Manager on zPanel CP
F.A.Q
Q: Does zPanel already include Apache, MySQL and PHP?
A: Yes. During installation the installer also installs Apache web server, MYSQL, PHP5 and PHPMyAdmin along with necessary tools like FTP server and mail server.
Q: How much RAM zPanel consumes?
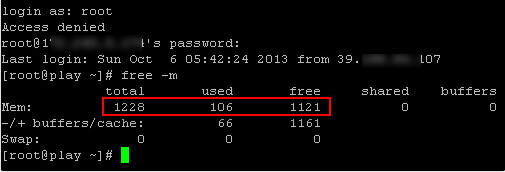
A: Once installed, with all of those services installed and running (Apache, Mysql, PHP, SMTP, IMAP, POP3 and FTP), I got following on my vps:

As you can see above, used RAM is about 106MB (still below 128MB) assuming with no traffic (fresh zPanel install).


